Author: admin

  • Playing bitmap texture animation in 3D Max (Image Sequence, ifl)

    Playing bitmap texture animation in 3D Max (Image Sequence, ifl)

    This tutorial will guide you through the simple steps for playing bitmap animation (a movie) using an image sequence and an IFL file (.ifl).

    https://help.autodesk.com/view/3DSMAX/2020/KOR/?guid=GUID-CA63616D-9E87-42FC-8E84-D67E1990EE71

    1) Prepare the image sequence to be used for movie playback in 3D Max.

    How to Play Bitmap Texture Animation in 3ds Max – Step 1


    2) In the file list of the image sequence, set the suffix of the file name to the same number of digits (for example, sample000 ~ sample120)

    How to Play Bitmap Texture Animation in 3ds Max – Step 2

    3) Select IFL Manager from more in Utilities.

    How to Play Bitmap Texture Animation in 3ds Max – Step 3

    4) Click select in IFL Manager and select the last image file in the image sequence.

    How to Play Bitmap Texture Animation in 3ds Max – Step 4
    How to Play Bitmap Texture Animation in 3ds Max – Step 5

    5) You can see that the prefix of the image file is displayed in the working file prefix, and the start and end frames of the image sequence are entered in start and end.

    How to Play Bitmap Texture Animation in 3ds Max – Step 6

    6) Click create and save the IFL file (.ifl) in the folder. The .ifl file means the list of bitmap files to be used for each frame.

    How to Play Bitmap Texture Animation in 3ds Max – Step 7

    7) You can see that the IFL file has been created in the folder, and if you open it in a text editor, you can see the list of file names.

    How to Play Bitmap Texture Animation in 3ds Max – Step 8
    How to Play Bitmap Texture Animation in 3ds Max – Step 9

    8) Prepare the object to be used for video playback in the scene.

    How to Play Bitmap Texture Animation in 3ds Max – Step 10

    9) Set the IFL file to the bitmap of the diffuse map in the material.

    How to Play Bitmap Texture Animation in 3ds Max – Step 11

    10) If you play the animation in the timeline, you can see the video playback in the viewport.

    How to Play Bitmap Texture Animation in 3ds Max – Step 12
  • How to remove noise from an image or video using the remove grain effect in After Effects

    How to remove noise from an image or video using the remove grain effect in After Effects

    1)Add the image or video from which you want to remove noise to your composition.

    2) Add the remove grain effect to the image or video.

    3) Select preview in the viewing mode of the effect.

    4) A preview area will appear on the image.

    5)You can move the area by clicking and dragging the center of the area.

    6)Here you can see the result after applying the grain removal effect to the area. The noise has been removed compared to the outer area.

    7) The higher the noise reduction value, the more noise will be removed.

    8) To apply the effect to the entire image, select final output in the viewing mode.

    9) You can see that the noise has been removed from the entire image.

    Image after noise removal

    Image before noise removal

  • Creating a simple rain effect in After Effects

    Creating a simple rain effect in After Effects

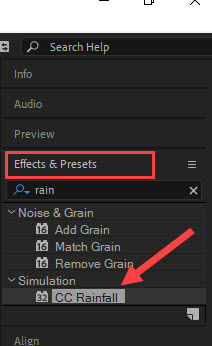
    1) Create a new composition and add a background image.

    2) Check Effects & Preset in the Window menu at the top.

    3) Search for CC Rainfall in the Effects & Preset panel and add the effect to the image layer(Background image layer or new solid layer)

    4) You can see that the Rainfall effect has been added to the image.

    5) You can set the properties of CC Rainfall in the effects added to the layer or in the effect controls panel.

    Set the amount, size, speed, direction, color, etc. of rain.

  • Displaying anchor points and bounding boxes of layers in After Effects

    Displaying anchor points and bounding boxes of layers in After Effects

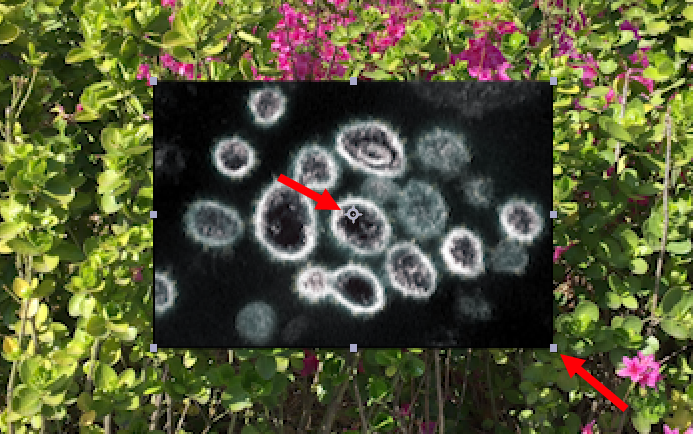
    1)In the example below, you can see that the anchor points and bounding box of the selected image are missing.

    2) In the composition panel, click the location shown below (to the right of the composition name) and go to view options.

    3) Check handles in view options.

    4) You can see that the anchor points and handles are displayed normally.

  • How to link to another layer using Parent in After Effects

    How to link to another layer using Parent in After Effects

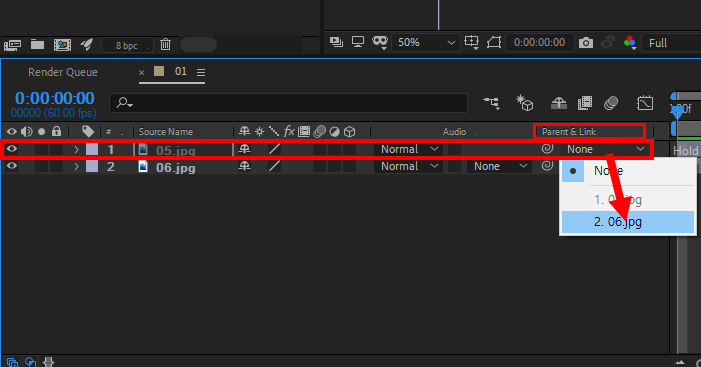
    1) Create a new composition and add two images.

    2) Set the parent&link of the layer you want to set as the parent. The default is none, and select the layer you want to set as the parent.

    3) If you change the transform of the layer, you can see that the parent is set normally.

  • Adding gradient color to shape layer in After Effects(Gradient fill)

    Adding gradient color to shape layer in After Effects(Gradient fill)

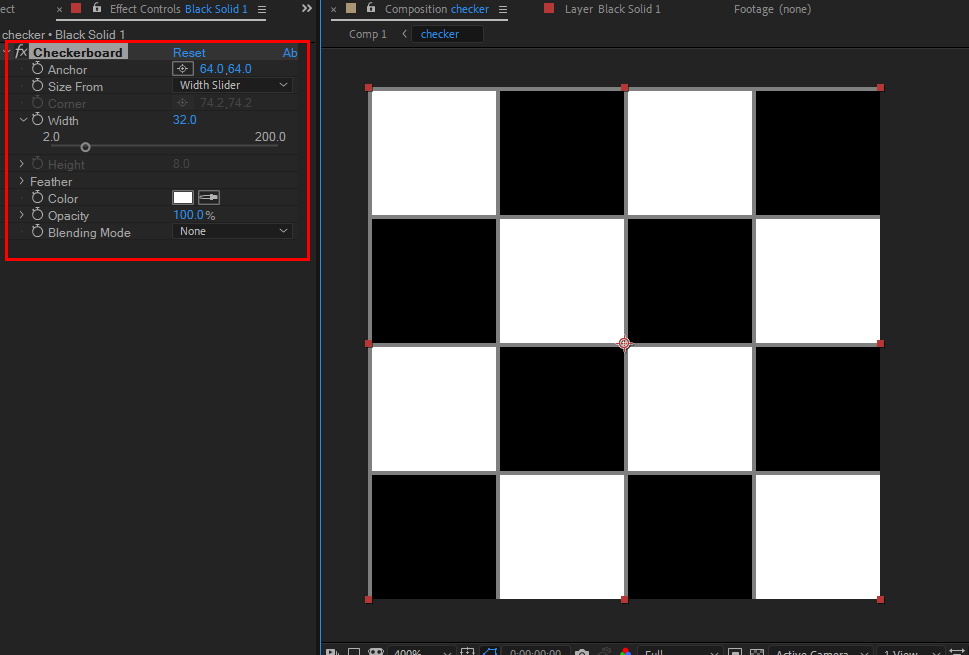
    1) Select the shape tool from the toolbar at the top.

    2) Click the place shown below (fill) to go to the fill option.

    3) Select linear gradient from the fill option.

    3) Set the color of the gradient and create a shape.

    4) If you want to add a new gradient to a single color shape,

    5) First, remove the fill property of the shape layer (delete).

    6) Select gradient fill from the add of contents.

    7) You can see that the gradient color has been added to the shape.

    8) You can modify the gradient by changing the property of the gradient fill added to the layer.

  • Clearing the disk cache in After Effects

    Clearing the disk cache in After Effects

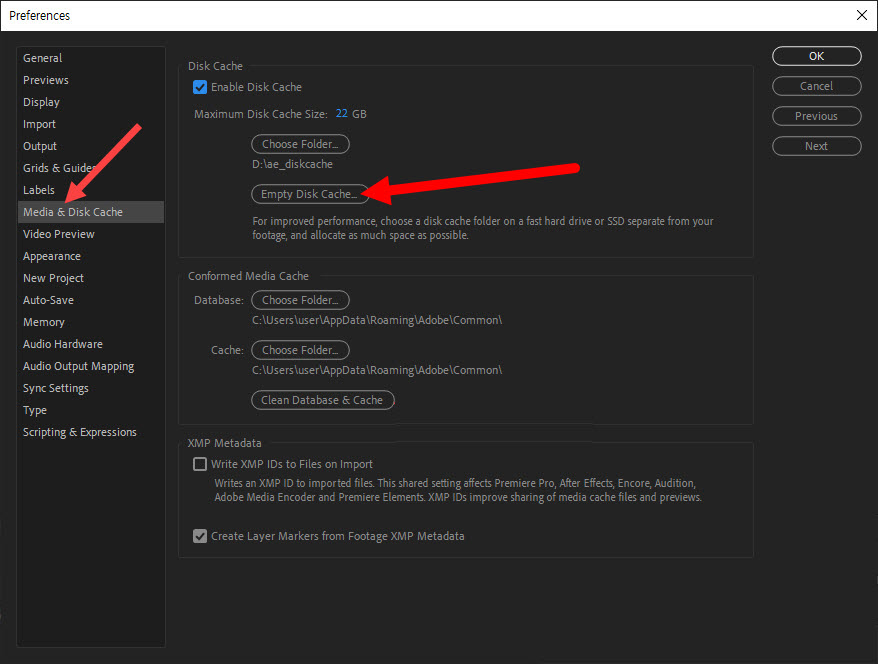
    1) Go to Media & Disk Cache in Preferences from the Edit menu at the top.

    2) Click Empty Disk Cache to clear the disk cache in the cache folder.

    3)Clicking OK will delete all disk cache files.

    https://helpx.adobe.com/after-effects/using/memory-storage1.html

  • Verifying the metadata of a video source in After Effects

    Verifying the metadata of a video source in After Effects

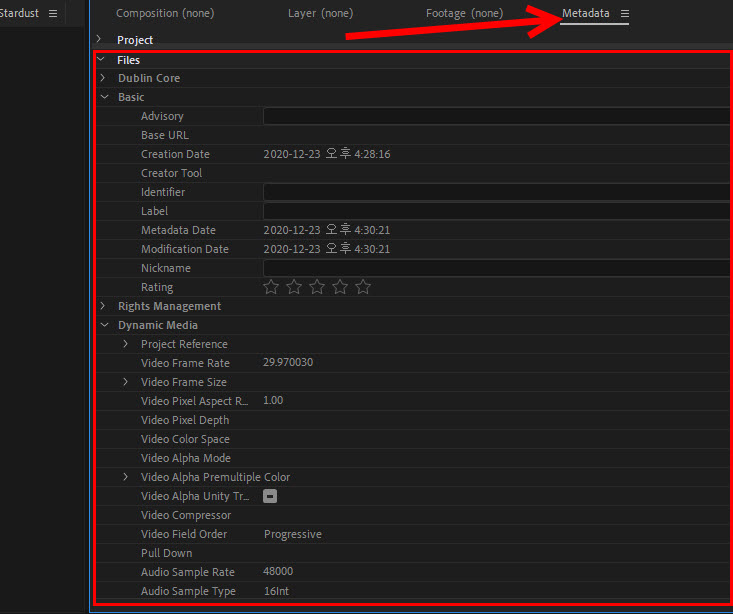
    1) Select a video in the Project panel to display a preview and video information.

    2) To check the metadata of a video, go to metadata in the window menu at the top.

    3) You can check the metadata of a video in files.

  • Create image tiling using motion tiles in After Effects

    Create image tiling using motion tiles in After Effects

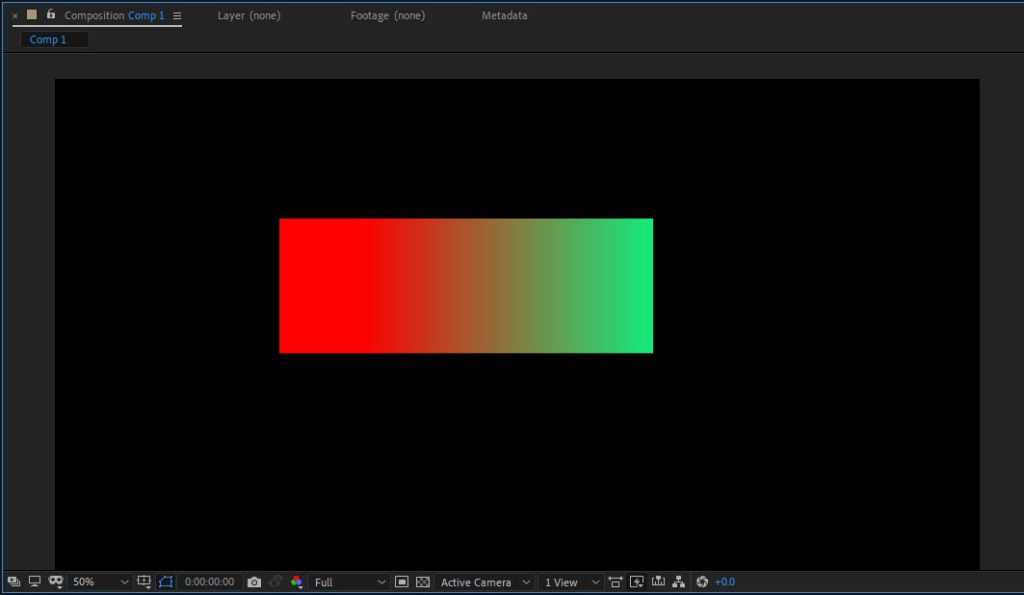
    1) Create a composition with a 1:1 ratio.

    2) Add a solid layer to the composition to be used for tiling.

    3) Add a checkerboard effect to the solid layer.

    4) Change the properties of the checkerboard to create a checker texture as shown below.

    5) Create a new composition(comp 1) and add the previously created composition (checker).

    5) Add a motion tile effect to the checker composition.

    6) Increase the output width and output height values ​​to complete the image tile.

  • Adding an outline to text in After Effects

    Adding an outline to text in After Effects

    1) Create a new text layer.

    2) Enter your text.

    3) Check character in the window menu at the top.

    4) Go to the character panel.

    5) Set the stroke color.

    6)You can see that an outline has been added to the text.