1) Search for the Responsive Lightbox & Gallery plugin in WordPress add plugin, install and activate it (install now, activate)

2) You can see a new gallery menu in the dashboard.

3) Add a new gallery category in the categories menu of the gallery

4) You can see that there is no gallery currently in the gallery menu. To add a new gallery, go to add new gallery at the top.

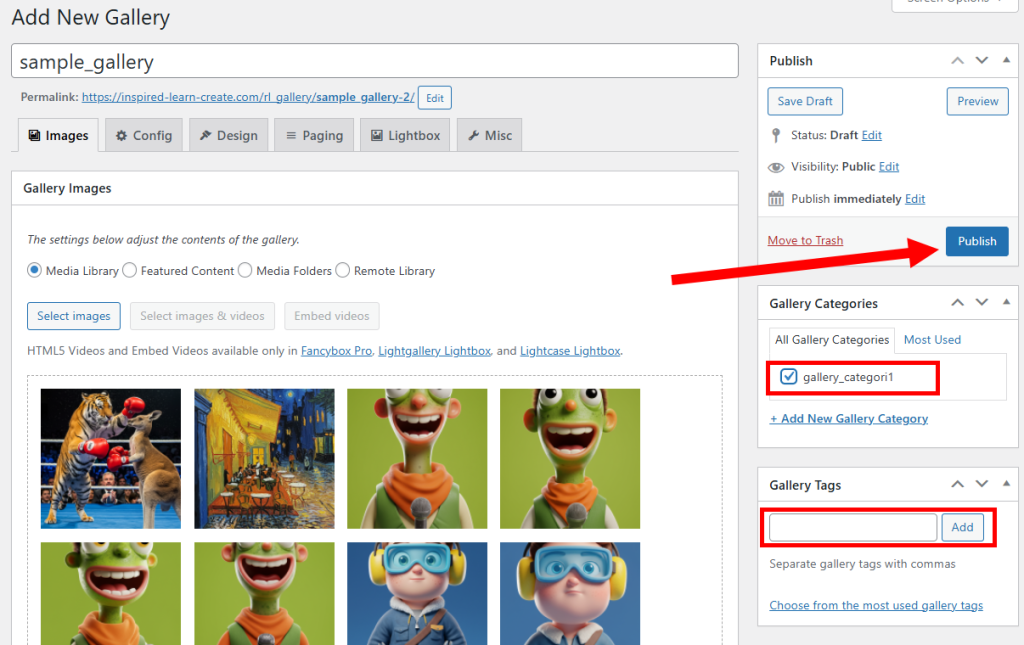
5) Set a gallery name and click select images to choose images to use from the gallery.

6) Select all the images you want to add to the gallery from the media library and click use these items.

7) Set the gallery categories and tags and click publish to add the gallery.
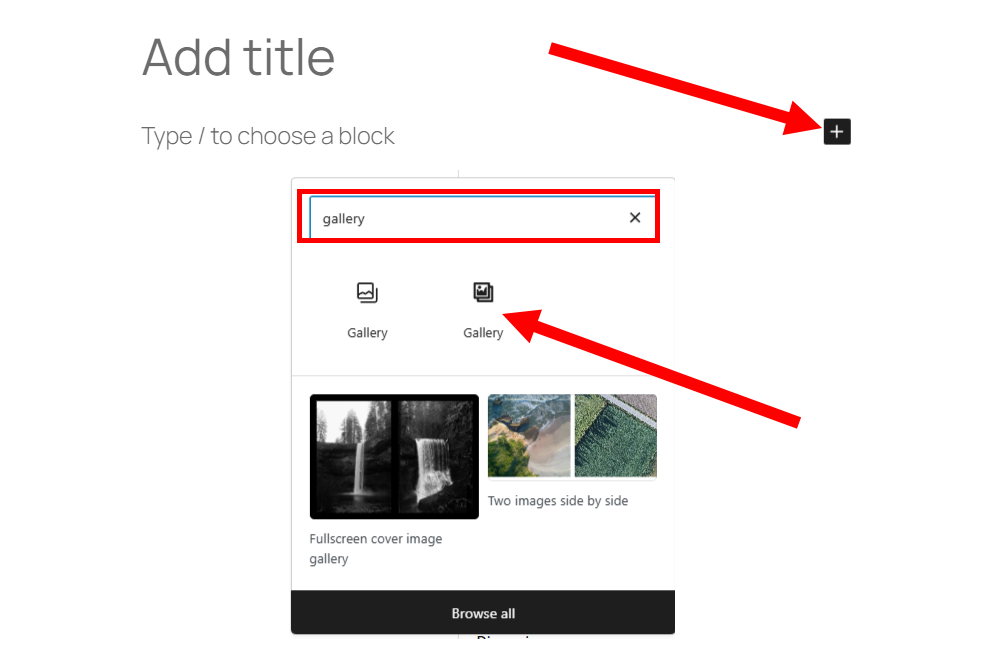
8)Add a block to a new post. Choose the Plugin Gallery (responsive lightbox gallery) from the Basic Gallery and the Plugin Gallery.
9) Go to select gallery in the gallery block.

10) Select the gallery to add and click select gallery.

11) You can see that the gallery block has been added to the post. Publish the post.

12) You can check the gallery of the post in the site view.

![[WordPress]Sign up for Fastcomet and set up WordPress](https://inspired-learn-create.com/wp-content/uploads/2025/06/2025-01-26_15-28-08-1024x588.jpg)
![[WordPress] Setting Up Domain SSL (Auto SSL) on Fastcomet Web Hosting Site](https://inspired-learn-create.com/wp-content/uploads/2025/06/2025-01-26_17-34-40-1024x611.jpg)